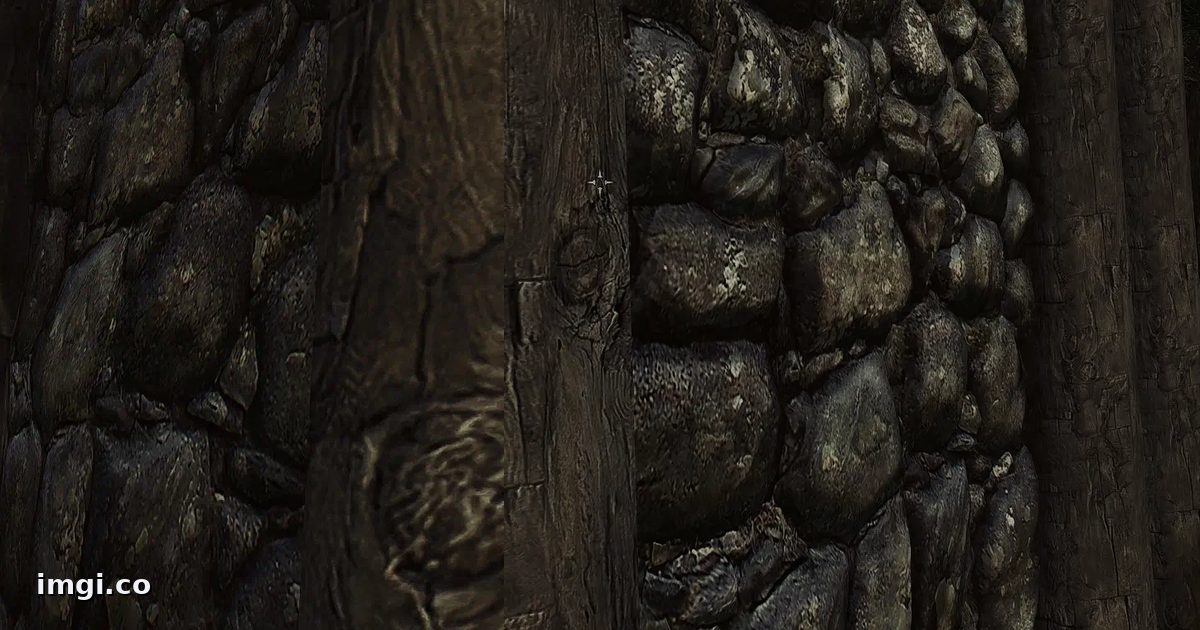
Skyrim texture packs have reached absurd scale. One recent overhaul weighs 16 GB and touches 31,652 textures, and the comments under it ask the same question the comments always ask: is it actually better, or just bigger? The honest answer for most people is “no idea”. A proper texture mod comparison takes a bit of method, the mod page gallery doesn’t provide it, and the community resource that used to, Nexus’s huge Texture Pack Comparison Project, has been hidden by its author since 2024. What’s left is YouTube montages, which run your evidence through video compression before you ever see it.
So here’s the method, plus live examples you can drag.
What a mod page gallery can’t tell you
Gallery shots are marketing. Usually good marketing, taken at golden hour in the pack’s best-looking location, and completely disconnected from the question you’re trying to answer, which is: on the surfaces I stare at for two hundred hours, is this pack better than what I run now?
For that you need pairs. The same wall, the same barrel, the same stretch of road, captured with the pack on and off, and viewed in a way your eye can actually compare. I’ve installed a 2 GB pack for a dungeon type I visited twice in a playthrough. The download button asks fewer questions than a comparison does, and that’s exactly the problem.
Capture pairs worth trusting
Same rules as any mod comparison, with one texture-specific addition:
- One variable. Disable the other visual mods while you shoot, or at least freeze your load order except the pack you’re judging. Two texture packs plus an ENB is a stew, not a test.
- Same spot, same light. In Skyrim, console
tfc 1freezes time with a free camera andfw 81aforces clear weather. Overcast light is even better for textures than clear, no harsh shadows lying across the detail. - PNG, always. JPEG’s compression eats fine texture detail, which is the entire subject of the test. The format guide covers why.
- The texture-specific rule: shoot each surface at three distances. Nose against the wall, five steps back, and across the room. You’ll see why in a second.
The distance trap
Here’s the thing texture pack pages never mention. Games don’t show you the full-resolution texture most of the time. Every texture ships with a chain of progressively smaller copies (mipmaps), and the engine picks one based on how much screen space the surface covers. Stand five meters from a wall at 1080p and a 4K texture and its 2K version can resolve to the same pixels, because the engine is showing you a downscaled mip of both.
Which means: a 4K pack proves itself only up close. That’s why you shot three distances. If the pack looks better nose-to-wall but identical from five steps, you’re deciding whether to spend VRAM on the two percent of playtime you spend sniffing masonry. Sometimes yes! Player homes, crafting tables, anywhere the camera lingers. But decide it consciously, because the mid-distance shot is the one that looks like your actual game.
The wall itself makes the case. Drag this one, shot close, where the difference is real:
That comparison is from Skyrim HD - 2K Textures. For the close, mid, and wide views of the same idea, Enhanced textures detail (UV-tweaks) has five scenes in an album.
The VRAM math nobody does
Texture packs cost video memory, and the cost is countable. GPUs store game textures block-compressed, roughly one byte per pixel for the common high-quality format. A 4096x4096 texture lands around 21 MB with its mipmaps; the 2048 version of the same texture is about a quarter of that. Multiply by a few thousand replaced textures and a full 4K overhaul can add several gigabytes of VRAM demand over the 2K version of itself.
While you’re under budget, that’s free. The moment you’re over, it’s stutter, the kind that shows up crossing cell boundaries and turning the camera fast, and no still screenshot will ever show it to you. So pair the eyeball test with the meter: check VRAM use in your monitoring overlay before and after, in a city, not on a mountaintop. A pack that wins the close-up comparison and blows your memory budget loses. The graphics settings guide goes deeper on catching that kind of cost.
And a caveat in the other direction, since upscaled packs are everywhere now: AI-upscaled textures are bigger by definition but only sometimes carry real new detail. The same test applies, up close, against the original, with the added-detail check if you want to be rigorous about it.
Read the pair like a texture artist
Once the slider’s in front of you, most people stare at the middle and form a vibe. There’s more signal in four specific checks.
Tiling first, and on the mid-distance shot, not the close one. High-resolution textures with lazy variation repeat visibly, the same stone, the same crack, marching across a wall in a pattern your eye catches from ten meters even when each individual stone looks great. A well-varied 2K wall beats a repetitive 4K one at any distance you actually play at.
Then light response. Detail can live in the color layer or in the relief, and the difference matters in motion. If stones gain crisp painted shadows but the shadows don’t sit where the scene’s light says they should, the pack sharpened the picture rather than the surface. Grazing light along a wall is where real relief work shows up and painted-on detail falls flat.
There’s also consistency, which nobody thinks about until it bites: a single 4K barrel in a 1K room looks worse than a uniform 2K everything, because your eye reads the mismatch as wrongness even when it can’t name it. Judge a pack on how a whole scene hangs together, which is exactly what the wide shot you captured is for.
And watch for color drift. Plenty of packs quietly re-tint while they upscale, warmer wood, greyer stone. Nothing wrong with that, but then you’re choosing art direction, and the pack should be judged as one, against your game’s palette, not just on pixel count.
Publish the pairs, settle the thread
Once you’ve got honest pairs, put them where other people can judge too. Upload each pair at imgi.co, free, no account, label the sides with pack names and the distance (“ETD, close” beats “after”), and share the link. Served images are your exact uploaded bytes, so the fine detail you’re arguing about survives hosting. Comparing three packs on the same wall? One comparison holds up to ten images with a dropdown to pick the pair. A whole survey, walls, roads, rocks, interiors, goes in an album under a single link, which is how the examples above are organized.
What stills can’t settle: shimmer. Over-sharpened normal maps look spectacular in a screenshot and crawl with sparkle in motion. If a pack fails in motion, say so in a comment next to your comparison link, or capture a short clip. The slider carries the detail argument; motion problems need motion.
Screenshots in this post, including the cover, are the mod authors’ own capture pairs: Enhanced textures detail (UV-tweaks) by Some_Random_Guy_83 and Skyrim HD - 2K Textures by NebuLa.