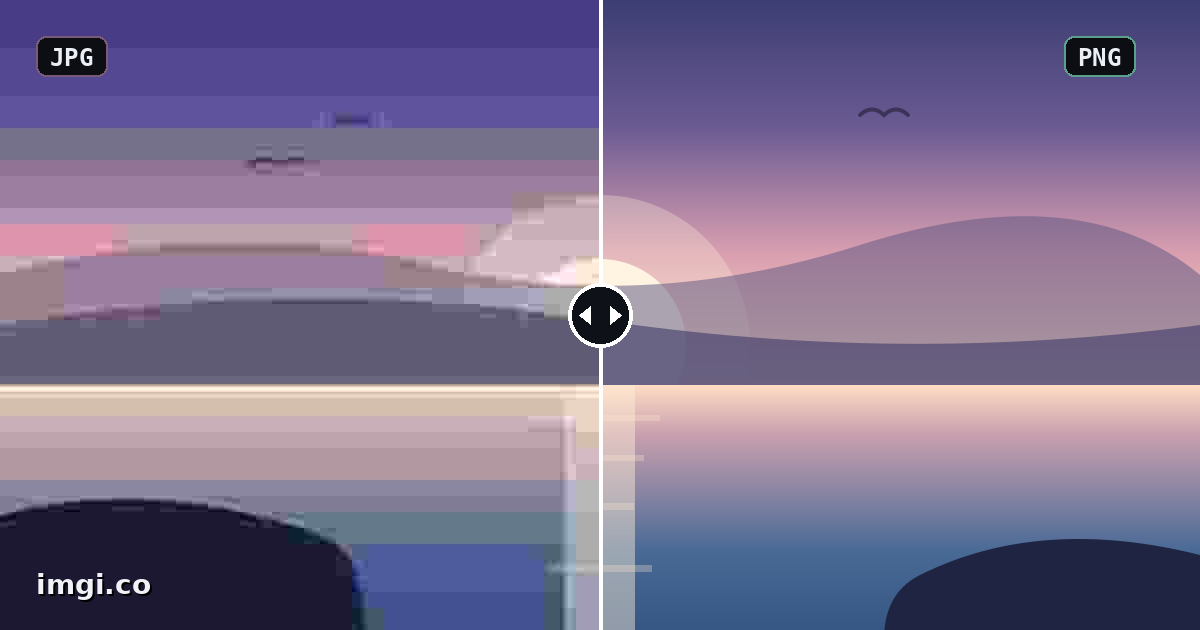
Two people post the same screenshot of the same game. One looks crisp, one looks smeared, and neither of them edited anything. The difference was a file format picked by whatever tool happened to save the image, and it decides how much of your screenshot survives the trip to someone else’s screen.
If you ever compare images, or post screenshots anyone might judge, the three formats that matter are JPEG, PNG, and WebP. Each throws away different things. Knowing what gets thrown away is the entire skill.
What JPEG throws away
JPEG is built for photographs viewed by forgiving humans. It slices the image into small blocks, describes each block approximately, and, the part people don’t know, it stores color at a lower resolution than brightness in typical settings. Your eye mostly forgives that. Fine color edges don’t: red text on blue, neon signs, sharp UI elements all pick up a faint smudge around them.
The damage concentrates exactly where screenshots carry their evidence:
- Hard edges and text grow faint ripples, the “mosquito noise” you’ve seen around subtitles on compressed video.
- Smooth gradients like skies band into visible steps at lower quality settings.
- Fine grain, dithering, and film effects partially dissolve, because approximating them is what the compression does.
And it compounds. Save a JPEG of a JPEG and both passes take their cut; a screenshot that went through a chat app, then an editor, then another upload can be three or four generations deep. Each looked “fine.” The sum doesn’t.
None of this makes JPEG bad. For a photo on a webpage it’s excellent, and at quality 85 or so most photographic content is visually clean. But it’s a format for showing, not for proving.
What PNG refuses to throw away
PNG is lossless, full stop. Every pixel that was on your screen is in the file. Text stays razor sharp, gradients stay smooth, grain stays grainy, and a PNG re-saved a hundred times is identical to the first one. That’s why it’s the default screenshot format on basically everything, and why every guide on this blog says the same boring thing: shoot PNG.
The price is size. On photographic content a PNG can be several times bigger than a good JPEG, which is why cameras don’t use it and why some upload forms resist it. For screenshots, that tradeoff is nearly always worth eating, because a screenshot exists to show exactly what was on screen, and “exactly” is the one thing JPEG can’t promise.
WebP, the one your tools picked without asking
WebP does both jobs: it has a lossy mode that beats JPEG on size at similar quality, and a lossless mode that usually undercuts PNG. It supports transparency in both. Browser support stopped being a concern years ago; the stragglers now are older desktop apps and the odd forum that treats .webp as an alien attachment.
You mostly don’t choose WebP, it chooses you: sites convert uploads to it, screenshots arrive as it, and half the images you save from the web already are it. Fine. Just know which mode you’re holding. A lossless WebP is as trustworthy as a PNG. A lossy one carries JPEG-style approximations, prettier per byte, but approximations all the same. If a file’s provenance is unclear and pixel truth matters, treat it as lossy.
The rule for comparisons
The moment two images are going under a slider, the format rule gets strict: the format must not be the variable. Compare a JPEG against a PNG of the same frame and you’re comparing compression, not the thing you changed. It’s one of the most common ways an image comparison quietly lies.
So keep every file in the pipeline lossless, PNG or lossless WebP, from capture to upload. Game screenshots: use the game’s own key, or turn on Steam’s “Save an uncompressed copy”. Phone shots for a before and after: both sides out of the same camera, not one saved from a messaging app that recompressed it on the way.
Exception: when compression itself is the question. “How much does quality 70 actually cost this image?” is a legitimate comparison, and a good one, run the original against the compressed export and look at the sky and the text. That’s the one time a lossy file belongs on one side of the slider. Label it.
One more link in the chain has to hold: the place you host the comparison. A tool that “optimizes” your uploads is adding its own generation of loss on top, after all your discipline. imgi serves the exact bytes you upload, no re-encoding ever, which is the whole reason it can be trusted for pixel-level comparisons. Drop both files in at imgi.co and what the viewer drags across is your data, not a compressor’s opinion of it.
See it once and it sticks
The fastest way to internalize all of this is one experiment: take a screenshot with fine detail, text, a gradient sky, some texture. Export it once as PNG and once as JPEG at quality 60. Put both under a slider and sweep it slowly across the text and the sky.
That comparison above is exactly this kind of test. Once you’ve watched detail flip from mush to sharp at a moving boundary, you stop needing rules of thumb; you know what each format costs because you’ve seen the receipt.
Quick reference, since somebody will ask: screenshots and UI, PNG. Photos for a page or a post, JPEG or lossy WebP at a sane quality. Anything going under a comparison slider, lossless only. Animations are their own mess, GIF against MP4 and WebP, and the before and after GIF guide covers that one.