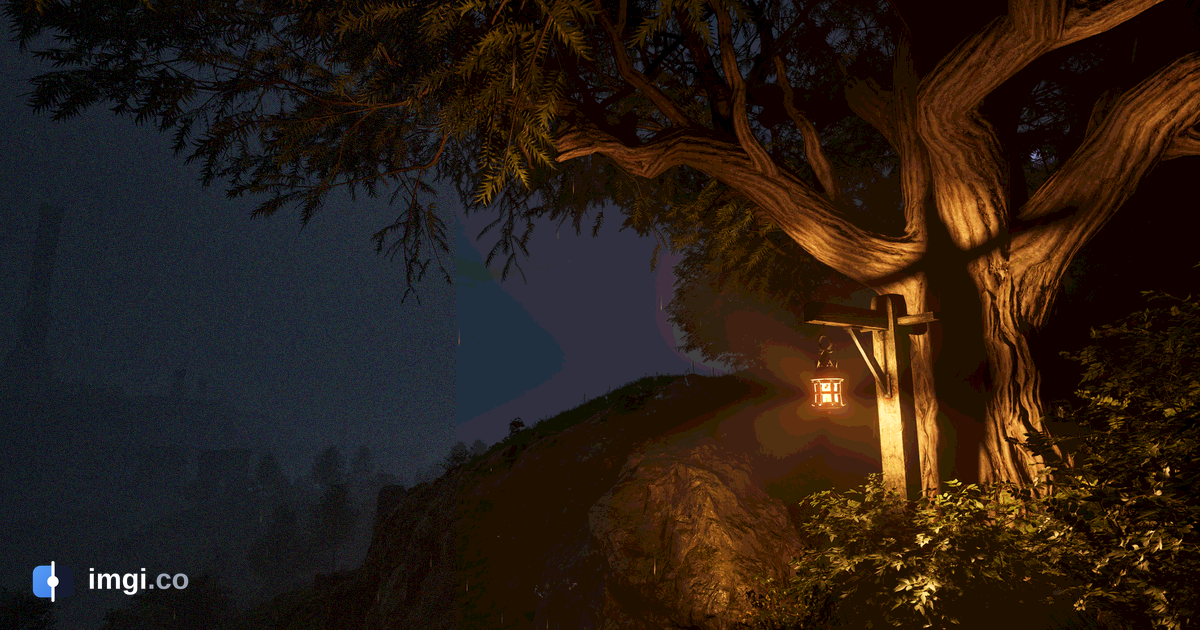
There’s a specific moment when most people meet color banding. A dark scene in a movie, a night sky in a game, a fog bank rolling across a valley, and instead of a smooth falloff from dark to darker, the image shows contour lines, concentric stripes like a topographic map of a hill that shouldn’t be there. Once you’ve seen it you can’t stop seeing it. Sorry in advance for the rest of this post.
Banding isn’t a defect in your monitor, or usually even in the content. It’s arithmetic, and the arithmetic is losing. This post walks through why 256 shades per channel, which sounds like plenty, runs out exactly where your eyes are strongest, why the fix the industry chose for HDR wasn’t “more bits” alone but a smarter way to spend them, and why the oldest trick in computer graphics, adding noise on purpose, still beats everything else. There are live comparisons to drag, so you can watch bands appear and dissolve.
The budget: 256 steps
Almost every image you’ve ever looked at on a screen stores each pixel as three numbers, one each for red, green and blue, and in standard 8-bit encoding each number runs from 0 to 255. That’s 256 possible levels per channel, and 256 x 256 x 256 is about 16.7 million colors, a figure that has appeared on spec sheets since the 1990s and always sounds like more than anyone could need.
The catch is that “16.7 million colors” is the size of the whole box, and a gradient doesn’t get the whole box. A sky fading from deep blue at the top of the frame to lighter blue at the horizon travels one narrow path through it. If the dark end is, say, (14, 20, 44) and the light end is (90, 104, 160), the blue channel covers 116 distinct values. Stretch those 116 steps across 1440 rows of pixels and each value must hold constant for about 12 rows before it’s allowed to change. Twelve-pixel-tall stripes of mathematically identical color, stacked. That’s banding. The file has no values between one step and the next, so the ramp you asked for comes back as a staircase.
It gets worse in the dark, for a reason buried in your retina. Human vision is roughly logarithmic: you judge brightness by ratios, not amounts, so the visual distance from level 16 to 17 in the shadows is enormous compared to 240 to 241 in the highlights, even though both are “one step.” Standard encoding (gamma, roughly a power curve inherited from CRT physics) partially compensates by packing more codes into the shadows, but only partially. Dark gradients, night skies, fog, vignettes, shadow falloff on a wall: these spend their pixels exactly where the steps between codes are still most visible. So banding is, overwhelmingly, a dark-scene problem.
The comparison below isolates the effect, no compression involved, both sides 8-bit PNGs of the same dark blue-hour gradient. The left side is quantized in coarse steps; the right side stores the identical ramp with one added ingredient we’ll get to shortly. Drag:
Where the bands come from in practice
If banding were only a bit-depth problem you’d see it constantly, and you don’t. Real photos hide the staircase under sensor noise, texture and grain; a gradient has to be clinically clean before the steps line up and become contours. The places it shows up are the places gradients are clean by construction, and each stage of the pipeline can either add bands or scrub them away.
Rendered content. Game engines compute lighting in high precision internally, then write the result into display buffers. Skies, volumetric fog, light shafts and screen-space glow are all huge, smooth, synthetic gradients, the exact worst case. Whether they band on your screen depends on whether the engine bothered to dither on output, and the difference is dramatic enough that Playdead devoted part of a famous GDC talk on INSIDE’s rendering to exactly this, because their game was nothing but fog, gloom and darkness, a banding minefield from end to end.
Compression. Even when the source is clean, lossy encoders love flat regions. JPEG and most video codecs spend their bits on edges and texture and starve smooth areas, quantizing away the subtle variation that was masking the steps, and sometimes introducing block-shaped banding of their own. Streaming video at aggressive bitrates is the world’s most reliable banding generator: the dark scenes that need the most tonal precision get the fewest bits. If a gradient looked fine in the master and striped on the stream, the encoder did it.
Editing. Every rounding pass in an 8-bit working space is a chance to align errors into contours. Stack a curves adjustment on a levels adjustment on a saturation tweak, each one rounding 256 levels back into 256 levels, and values that started distinct merge into shared steps. This is why photographers who work on skies and studio backdrops edit in 16-bit and only convert down at export, and why “it banded after I brightened the shadows” is such a common complaint: brightening shadows stretches the region where codes were scarcest.
The panel itself. Plenty of monitors marketed with billions of colors are 8-bit panels using frame rate control, flickering a pixel between two adjacent levels fast enough that your eye averages them into an in-between shade. Done well it works. A cheap panel that’s really 6-bit+FRC can band on gradients that are encoded perfectly. Before blaming a file, it’s worth knowing what your own screen can do; a test ramp like the comparison above doubles as a quick panel check.
10-bit, and why HDR forced the issue
The obvious fix is more steps. 10-bit color stores 1,024 levels per channel instead of 256, about 1.07 billion colors total, quadrupling the resolution of every ramp. Professional photo and video pipelines have used 10-bit and up for decades, and modern codecs (HEVC, AV1) handle it natively; a 10-bit encode can even compress more efficiently for dark content, because the encoder isn’t wasting effort on quantization contours.
But the industry moment that made bit depth unavoidable was HDR. Standard dynamic range asked its 256 steps to cover roughly 100 nits of brightness. HDR displays target 1,000 nits and the format allows up to 10,000. Stretch 8 bits over that range with a conventional gamma curve and the steps become canyon-sized; even 10 bits, spent naively, would band visibly.
The solution was to stop spending steps evenly and start spending them the way your eye actually works, a rare case of perception research getting written directly into a broadcast standard. Dolby engineers took the Barten model of human contrast sensitivity, which describes the smallest brightness difference a person can detect at every luminance level, and built a transfer function whose steps hug just below that threshold everywhere: generous with codes in the shadows where you’re sharp-eyed, sparse in the highlights where you’re not. That curve is the Perceptual Quantizer, standardized in 2014 as SMPTE ST 2084 and adopted into Rec. 2100. HDR10 is, at its core, that curve carried in 10 bits (Dolby Vision uses a 12-bit version).
The design brief was literally “no visible banding from 0 to 10,000 nits,” and the lesson generalizes beyond HDR: banding was never really about how many bits you have. It’s about whether any code step, anywhere on the curve, is bigger than the smallest difference your eye can see at that brightness. PQ gets that right, which is how it stretches 10 bits across a hundred times the luminance range that plain gamma struggles to cover with 8.
Dithering: the old trick that still wins
Back to the comparison you dragged earlier. The smooth side of that gradient is also 8-bit. Same format, same steps available, no extra precision anywhere. The difference is a whisper of random noise, scaled to the size of the rounding step, added before the rounding happens.
This is dithering, and the mechanism deserves spelling out. Without it, every pixel in a region rounds the same direction, and the rounding error piles up into those coherent, visible contour lines. Add noise before rounding and each pixel now rounds up or down with a probability proportional to where the true value sits between steps: a value 30 percent of the way from level 51 to 52 becomes a pixel field that’s 70 percent 51s and 30 percent 52s. Your eye, averaging over the field, reads the in-between value that the format cannot store. The staircase is still there in the numbers. You just can’t see it anymore, because the error is spread as fine grain instead of collected into edges.
The price is paid up front and it’s small: a faint noise floor instead of false contours, and the noise energy is tiny compared to the banding energy it replaces. Film grain did this job for a century by accident. FRC panels do it in time instead of space. Good game engines do it on every output buffer (that INSIDE talk is the canonical field report). Astro and landscape photographers add 0.5 to 1 percent noise to sky gradients before exporting to 8-bit, for the same reason.
One warning before you go dithering everything, and it links this post back to compression: dither and lossy encoders are natural enemies. That fine grain is high-frequency detail, exactly what JPEG and video codecs are built to discard, so an aggressive encode can strip the dither and let the bands resurface, which is one reason platform re-encodes turn smooth gradients stripy. The dithered side of our comparison survived because it’s a PNG, byte-for-byte. If your beautiful smooth export bands after upload somewhere, the platform’s encoder probably ate your noise; there’s a whole post on that failure mode.
Banding’s lookalikes
Two other artifacts get reported as banding constantly, and since the fixes are completely different, telling them apart matters.
Posterization is what banding becomes at catastrophic scale: not subtle stripes in a gradient but flat cartoon-like patches across what should be continuous tone, usually with visible hue shifts between patches. It comes from running out of levels catastrophically rather than marginally, classically from extreme editing moves (pushing shadows four stops in an 8-bit file) or from images that survived some ancient GIF-era 256-color conversion. If the steps are big enough to have colors rather than shades, think posterization, and look for the editing step that crushed the range.
Compression block banding is stripes with corners. JPEG and video codecs process the image in blocks, and in starved dark regions each block collapses to a single flat value, so the “bands” have straight vertical and horizontal seams on an 8-or-larger pixel rhythm, a mosaic rather than contour lines. True quantization banding follows the gradient’s shape, curving with a vignette or a light falloff; block banding follows the codec’s grid. The distinction points at the culprit immediately: curved contours mean bit depth or missing dither, gridded ones mean the encoder, and the fix for the second is bitrate or quality, not bits per channel. The full mechanics of that failure are in the JPEG compression deep dive.
There’s also a hybrid, common on streaming platforms: the encoder strips the dither that was hiding real quantization steps, and both artifacts surface at once, contour lines with blocky edges. Dark scenes in compressed video routinely show the whole collection simultaneously.
Keeping bands out of your own exports
For anyone producing images rather than just diagnosing them, the playbook is short and almost entirely preventive.
Work deep, export late. Do gradient-heavy editing (skies, studio backdrops, vignettes, color grades on dark footage) in a 16-bit working space, and drop to 8-bit exactly once, at export. Every intermediate 8-bit save is a fresh quantization pass, and quantization errors compound in the exact regions that can least afford them.
Dither on the way down. Good converters dither when reducing bit depth, and some do it silently, which is why the same edit can band out of one tool and not another. If your export shows steps, adding around half a percent to one percent of fine monochrome noise to the gradient region before export is the fix photographers have used for decades. It disappears at viewing size and it breaks up the contours completely.
Mind the format. PNG preserves whatever you made, dither and all. JPEG at high quality usually keeps enough of the noise to stay smooth; JPEG at aggressive quality, or any platform-side re-encode, can strip it. For a gradient that has to survive recompression by someone else’s pipeline, slightly more dither than looks necessary is cheap insurance.
For real-time and video there are also repair-side options: video players and encoders ship deband filters (ffmpeg has one built in), and the ReShade injector’s Deband shader does the same job for games whose engines skipped output dithering. These work by detecting flat stepped regions and re-synthesizing the gradient with, of course, dithering. There is a certain comedy in the stack: one program quantizes a smooth ramp into stripes, and a second program un-stripes it by guessing what the ramp was. Cheaper to add the noise at the source.
Is your screen the problem? A two-minute test
Before trusting any banding diagnosis, calibrate the instrument, meaning your own panel.
Open the gradient comparison from earlier in fullscreen, in a dim room, at your monitor’s normal brightness. Look at the dithered side. On a decent 8-bit (or well-executed 8-bit+FRC) display, it should read as a completely smooth ramp with the faintest film-grain texture up close. If the dithered side also shows wide steps, your panel, cable or GPU output setting is reducing the signal, and no file will ever look smooth on it; a common culprit is a display pipeline quietly running at 6-bit+FRC, which is standard on cheaper laptop screens. If you have HDR or a “10-bit output” toggle in your GPU driver, it’s also worth checking whether enabling it changes the picture.
Then look at the quantized side and note how visible the bands are at a glance. That’s your personal banding sensitivity on this screen, in this light, and it differs a lot between people and between viewing conditions. Bright rooms hide bands. Dark rooms and OLED blacks expose them. If you grade images that other people will view in the dark, judge gradients in the dark.
Diagnosing a striped gradient, quickly
All of which compresses into a short decision tree.
Bands in a dark streamed movie or YouTube video: bitrate starvation, nothing wrong with your gear, the same scene on disc or a higher-tier stream will look better. Bands in your own render or screenshot that weren’t in the game: check whether a screenshot pipeline or format conversion re-quantized it. Bands after your own edit: your working depth is 8-bit somewhere it shouldn’t be; move the workflow to 16-bit and re-export. Bands in one specific image everywhere you view it: they’re baked in, and the fix is upstream, at whatever exported it without dither. Bands on gradients that other screens show smoothly: your panel or its cable/signal path is the bottleneck, and a known-good test ramp settles it in seconds.
The hard part of every one of those diagnoses is being sure what you’re looking at, because banding is subtle, viewing conditions change your sensitivity to it, and memory is useless for comparing two versions of a gradient. The tool that settles it is the same one used throughout this post: put the two candidates under a slider, aligned, at full resolution, with nothing re-encoded, and drag across the suspect region. A re-quantized export against its master, a streamed frame against a disc frame, your 16-bit workflow against your old one. Bands that survive that comparison are real; bands that don’t were your encoder, your platform or your panel talking. A difference check of the two versions goes one step further and lights up exactly which pixels the re-encode touched, which turns a maybe into a measurement.
So, do you need a 10-bit monitor?
The buying question, since it’s where this topic usually lands. For most people, most content, no: the overwhelming majority of images and SDR video are 8-bit at the source, and a 10-bit panel can’t add steps that were never encoded. Where native 10-bit (or good 8-bit+FRC) earns its price is HDR, where the PQ curve assumes those steps exist, and any work where you’re producing gradients: grading footage, retouching skies, rendering. There the deeper pipeline prevents you from shipping bands you couldn’t see.
More useful than the panel spec, and cheaper: make sure the pipeline is consistent. A 10-bit panel fed an 8-bit signal by a GPU set to 8-bit output shows 8-bit gradients, and this misconfiguration is common enough that checking your driver’s output settings is the first step of any banding complaint on good hardware. The chain is only as deep as its shallowest link.
256 steps was always a bet
Like JPEG’s 8x8 grid, 8-bit color is a 30-year-old wager about human perception: that 256 steps per channel, spent along a gamma curve, would be enough that nobody noticed the seams. For bright, busy, noisy images, the bet still pays every day. For clean dark gradients it was always slightly short, the industry has known it forever, and the whole toolkit in this post exists to paper over the gap: gamma to spend the codes better, PQ to spend them nearly perfectly, extra bits when the pipe allows, and a pinch of noise when it doesn’t.
Ten-bit pipelines are slowly becoming normal, HDR made perceptual code allocation standard practice, and one day banding may join interlacing in the museum of artifacts. Until then, when the fog rolls in and the contour lines rise, you’ll know exactly which part of the pipeline lost the bet, and how to prove it with one drag.